

Nigel Wakefield MCABE C.Build E has puzzled over the problems with upgrading older properties so you don’t have to.
As a practising surveyor with more than 40 years’ experience, I have faced the problems of insulating our older properties: here are my observations. For a successful insulation installation, it is necessary to understand the original construction and materials and what issues these will bring.
Walls
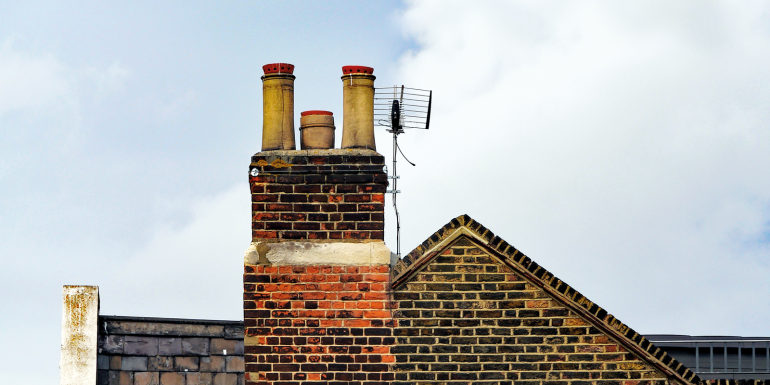
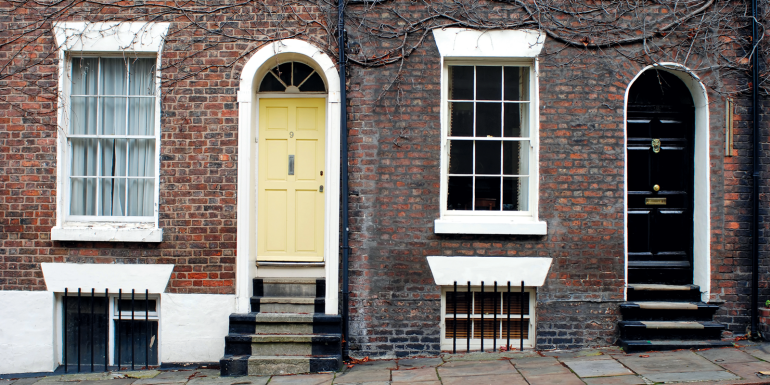
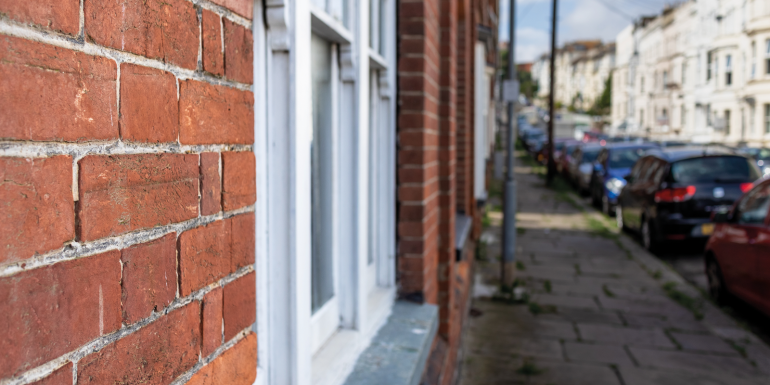
Older properties have walls known as nine-inch or one-brick-thick walls; they have plaster applied internally and may have externally applied render. They are commonly constructed of ‘soft’ red brick but they may also be built from London stock bricks, or white or buff gault clay bricks.
Often the rear and gable side walls will be built of lesser brick, saving the best quality only for the front elevation. They may include decorative terracotta courses to the main elevation or cheaper projecting string courses of brick and dentil bricks at eaves level.
Most are built without a damp-proof course, which may have necessitated retro-injection of a silicone damp-proof course. Early damp-proof courses, where found, are two courses of half-lapped slate bedded in mortar, but you might find bitumen-based damp-proof courses used late into the Edwardian period.
The internal face is usually finished in lime plaster applied directly to the brickwork. Where damp-proof courses have been retrospectively installed it was common practice to replace any damaged lime plaster with a ‘hard’ cement/sand plaster incorporating a salt retardant additive, used to hold back efflorescent and hygroscopic salts from disfiguring the decorations. Caution is required where a DIY drylining has been installed to hide, rather than cure, rising damp.
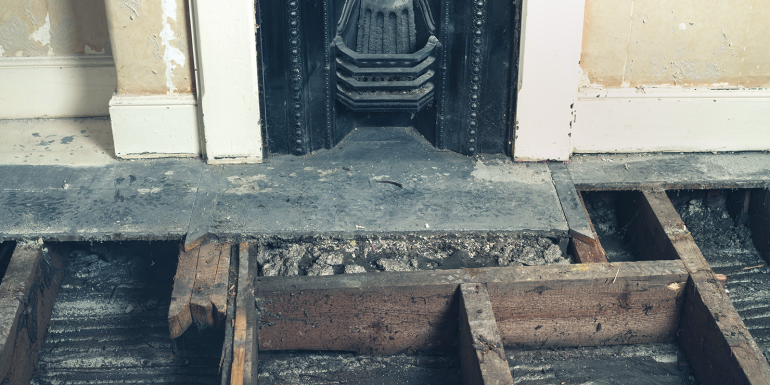
Many Victorian properties have single- or two-storey rear wings built from half brick (112mm) thick walls, with upper storey floor joists built into the wall on a 52mm end bearing. These walls are sometimes lined with lath and plaster onto timber battens. In Norfolk, some rear wing walls are drylined internally with water reed (the same material used for thatching roofs, laid out as individual ‘straws’ bound together with thin strips of timber and nailed to battens fitted to the wall) over coated with lime plaster.
No thermal insulation should be applied on top of this organic material, and it needs to be removed prior to internal insulation.
It is important to inspect for any structural damage too – bulging or leaning walls could mean that they were originally built too slenderly or that foundation movement is causing cracking in the wall and distortion of openings or failure of structure above openings, including dropped arches. These need to be addressed by a specialist before installing thermal insulation.
Built-in timbers
The best bricks were used on the external faces and these were constructed by the skilled bricklayers. However, the inside face brickwork built by the journeyman bricklayers used the miss-fired, miss-shaped and odd-sized bricks. This may have resulted in the brickwork losing course between the external and internal faces.
Occasionally, lengths of timber (spreaders) will be found built into the wall, where it was easier and quicker to cut a piece of wood of the correct thickness to recover the coursing than to cut bricks to size.
Something to also be aware of is that upper storey floor joists may be built up to a half brick deep into the wall. At window and door openings, brick arches support the brickwork over the openings. These are usually built from voussoirs, these being soft red bricks rubbed on a carborundum stone to the required shape and jointed tightly using lime putty.
Better quality work will have an arch or soldier course on the inside face, but smaller, cheaper properties may have a timber lintel on the inside face of the arch – a detail I have also seen in a mid-1920s property. In the latter property, weather had penetrated the arch and caused wet rot in the timber lintel.
In addition to these hidden timber elements built into external walls, it is quite common for skirting boards and picture rails to be secured to timber grounds built into the perpendicular joints of the brickwork.
Necessary steps
- investigate to establish the type of construction
- confirm site boundary locations
- inspect the walls for structural movement and where found seek expert help
- investigate if the wall suffers rising dampness or leaking services and repair and dry out the wall before applying the thermal upgrade
- investigate if the wall suffers significant penetrating damp during winter months to determine if external insulation/render is needed
- allow for building works in advance by a builder to accommodate external insulation. Do not depend on the insulation installer to carry out associated general building work
- remember alterations to boiler flues can only be undertaken by a Gas Safe registered engineer
- investigate to establish if built-in timbers exist, confirm their condition and see what treatment is required. Consider some properties can be nearly two centuries old. Repairs and alterations may have been undertaken that could compromise the upgrade work
- remove any organic material from the surface to receive internal insulation, including timber lath and plaster drylining and decorative treatments
- have a contingency plan to deal with any built-in timber that is discovered after work commences eg buy a quantity of boron rods or preservative plugs in advance so they are there if needed. Source some suitable bricks and mortar for use if a spreader plate has to be cut out of the wall; and
- consider how you will detail the insulation around window and door openings and cold bridges at perpendicular (party) walls.
Damp and fungus
The risk of fungal attack to any timbers built into the wall by the application to the internal face of insulation is significant. By thermally insulating the wall on the inside face, the brick wall will be made much colder. This will reduce the rate of evaporation of penetrating damp from the wall during the winter months.
In properties in exposed locations during prolonged periods of wet weather with the rate of evaporation thus reduced, the damp will penetrate deeper into the wall. This will place any timber built into the wall at greater risk of fungal attack. Furthermore, penetrating damp might be an intermittent defect not easily diagnosed during the warmer months of the year or during some milder or drier winters.
No discussion of insulation can be had without mentioning damp. Rising and penetrating damp and rainwater goods and services leaks must be corrected by a specialist and allowed to dry out before installation of thermal wall insulation. Condensation however, may be resolved by upgrading the thermal performance of the wall.
Penetrating damp is present in most walls but critical when it becomes evident as a stain. String courses projecting beyond the face, halfway up the wall, can often be the culprits of penetrating damp. I know of one case where the string course created a ledge against which driving rain was ‘funnelled’ into the core of the wall, meaning the damp was to the full depth of a solid brick.
Vital investigations
There are two options for upgrading the thermal performance of these walls – external insulation (with a protective render coating) or internal insulation (which is drylined). It is essential that the wall construction is investigated before specifying the insulation. Lintels above openings can be investigated by drilling a small hole through the plaster to establish if they are timber. Timber lintels at risk of penetrating damp should be taken out and concrete lintels installed. Timber grounds can be located at fixing positions in the skirting board and picture rail and can be cut out and the joint pointed up in mortar.
The direction of upper floor joists can be established from the floorboards. If they are built into the wall to be insulated, they can be protected from rot by fitting fungicidal plugs or boron rods. Drilling into the joist end bearings to fit these will also help determine if any pre-existent rot is present. If so, it will require repair to the joist end bearing before insulation.
What cannot be seen are spreader plates, which due to the random nature of their location in the wall will require removal of the wall plaster to expose them. If present the treatment of spreader plates involves cutting out the timber and piecing in brick cut to fit the size of the plate.
Removal of the plaster has one other benefit – it provides (approximately) another 25mm thickness of space for the insulation.
Where a property is in an exposed location there is a risk built-in timbers will be trapped between the face of rigid board insulation applied to the inside face of potentially damp brickwork. It might be advisable to consider multi-layered foil thermal insulation. This is installed on battens fitted to the wall, which leaves a cavity space between the brickwork and the foil insulation. This will require counter battens and a thin drylining on the room face of the insulation.
If the plasterboard drylining is screw fixed to the counter battens, it might be recovered for reuse when the foil insulation and the electrical installation require end-of-life replacement.
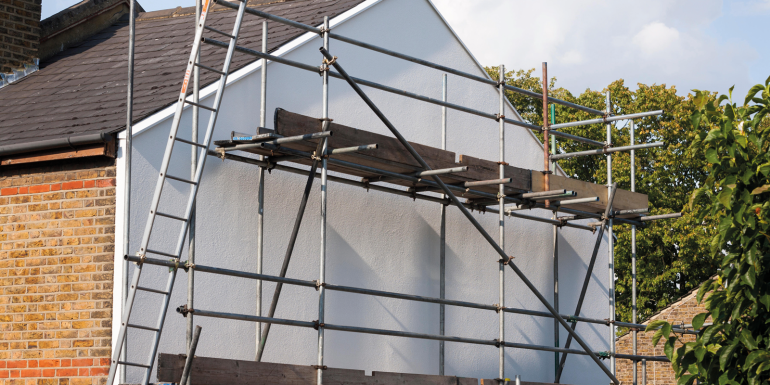
External insulation
End-of-terrace properties have the additional problem of a gable end wall. It is often the case that there is a staircase located against the wall or a chimney stack forming part of the wall. The staircase is too narrow to lose the width internal insulation needs and the chimney stack is problematic, especially if it is in use. External insulation offers a solution, subject to external space constraints, boundary ownership and other issues.
Location is all-important. Many Victorian (and later era) solid-wall properties that are in exposed positions suffer significant and prolonged weather penetration of the walls. Here external insulation with a render finish may be necessary. However, there are significant considerations.
For those in a conservation area and the many Victorian terraced houses that abut the site boundary – usually the public footpath – external insulation may not be an option. Additional considerations include: relocation of external soil and vent pipes and associated subterranean foul drain pipework and reinstating surfaces; relocation of rainwater pipes; extension of stone/concrete window sills and door thresholds; extension of boiler flues and extractor fan ducts where they pass though the affected walls; and adjustment of external electrical and communications installations and cabling. If the walls of the property are built up to a boundary, public footpath or road then you cannot insulate externally without risk of trespass.
Reports in the press also suggest there is a growing issue with poorly installed external insulation and render. The issue has been investigated by TrustMark and raised in parliament to the extent that more than 30 companies have been stopped from carrying out installation until their previous work has been rectified.
A common problem is perpendicular walls abutting the external walls such as party walls. It is necessary to insulate a strip of perpendicular wall adjacent to the new wall insulation. However, because the risk of weather penetration to this area is low, it might be done with a thin layer of rigid board insulation.
A similar issue will arise if a combination of external and internal insulation is fitted – where the two systems meet there must be an overlap in the insulation to prevent a cold bridge forming. The space between the upper storey floor joists will also require insulation.
Windows and doors
Understanding the construction of the windows is important before you insulate the wall. If the property is located in a conservation area, replacing the windows with modern thermally efficient fittings will require local authority consent and may not be approved. So, you will need to make the existing windows work in any thermal upgrade project.
Traditional Victorian properties are mostly fitted with timber rise and fall sash windows. These are supported off sash cords, which connect to lead or cast-iron weights. The weights counterbalance the weight of the window and allow it to remain in the open/closed position for ventilation. The weights run up and down the side of the window in weight boxes. What may appear to be large chunky solid timber jambs are constructed from thin planks of wood, which form two square hollow shafts.
These windows will have been repaired many times over their long life and future repairs will be required. To ensure access for future repairs (such as when the sash cords break) the window must not be obstructed by the new insulation. For internal insulation, this will mean removing architraves from around the inside face of the window and placing the insulation up against the edge of the exposed weight box, where it abuts the wall plaster, but not covering the weight box.
It is possible to upgrade the sash window – specialist companies or a suitably skilled carpenter can fit draught strips to horizontal rails and replace the vertical parting bead (the bead that separates the two sashes) with a modern plastic/rubber-insulated parting bead. Nevertheless, it will remain a single glazed window.
The solution may be to retain the original window as a ‘weather screen’ and to fit a secondary double-glazed window on the line of the wall thermal insulation. This window will need to be draught stripped and secure, but need not be weather-proof, being protected from rain and snow by the original historic window. The design must allow easy access to the original window for control of ventilation. It is also possible to have double-glazed windows made in timber to match the original windows in a conservation area, though this can be costly.
Traditional doors are of timber construction hung in timber frames. Timber has good thermal insulation properties, so it is possible to simply upgrade the frame and letter plate with draught stripping. If the space permits, a lobby might be formed with a new thermally insulated doorset and the historic door can be retained as a weather screen and for security, as well as aesthetics. Or a new door can be made to match the original, but may not offer significant thermal improvement on the original historic doors.
Older buildings require careful consideration when planning and carrying out work. You are likely to encounter earlier repairs that may not have been done to a good, or even safe, standard based on knowledge at the time; there may even be historic covering up of defects. Caution and a steady approach are required. Investigative and preparatory work is best undertaken by competent, suitably skilled tradespeople and, as you will understand from this piece, can not be passed on for the insulation installer to attempt.
Image credit | iStock | Getty | Alamy | Shutterstock
Related Content


Jobs

Permanent
Chartered Structural Engineer

Permanent
Project Quantity Surveyor

Contract
Senior Quantity Surveyor

Permanent


